LED strips can transform bathroom niches into functional and stylish features. Here’s how to install them safely and effectively:
- Choose the Right LED Strips: Use waterproof LED strips with at least an IP65 rating to withstand humidity. For direct water exposure, opt for IP67 or IP68.
- Pick the Right Color and Brightness: Warm white (2700K-3000K) creates a cozy feel, while cool white (5000K-6500K) is ideal for tasks. Aim for 150-300 lumens per foot for accent lighting.
- Get Proper Tools and Materials: Gather essentials like scissors, cleaning supplies, voltage testers, and mounting channels. Kits like Thunder Bunny’s include most components.
- Follow Safety Guidelines: Use a low-voltage Class 2 power supply, ensure GFCI protection, and seal all connections with silicone and heat-shrink tubing.
- Installation Steps: Measure and cut LED strips carefully, prep surfaces, adhere strips securely, and test connections. Avoid sharp bends and ensure proper polarity.
- Waterproofing: Seal connectors and end caps with silicone glue, and place wiring in dry, ventilated areas.
Whether for accent lighting or ambiance, LED strips can elevate your bathroom’s look when installed with care. Always consult a licensed electrician for electrical work.
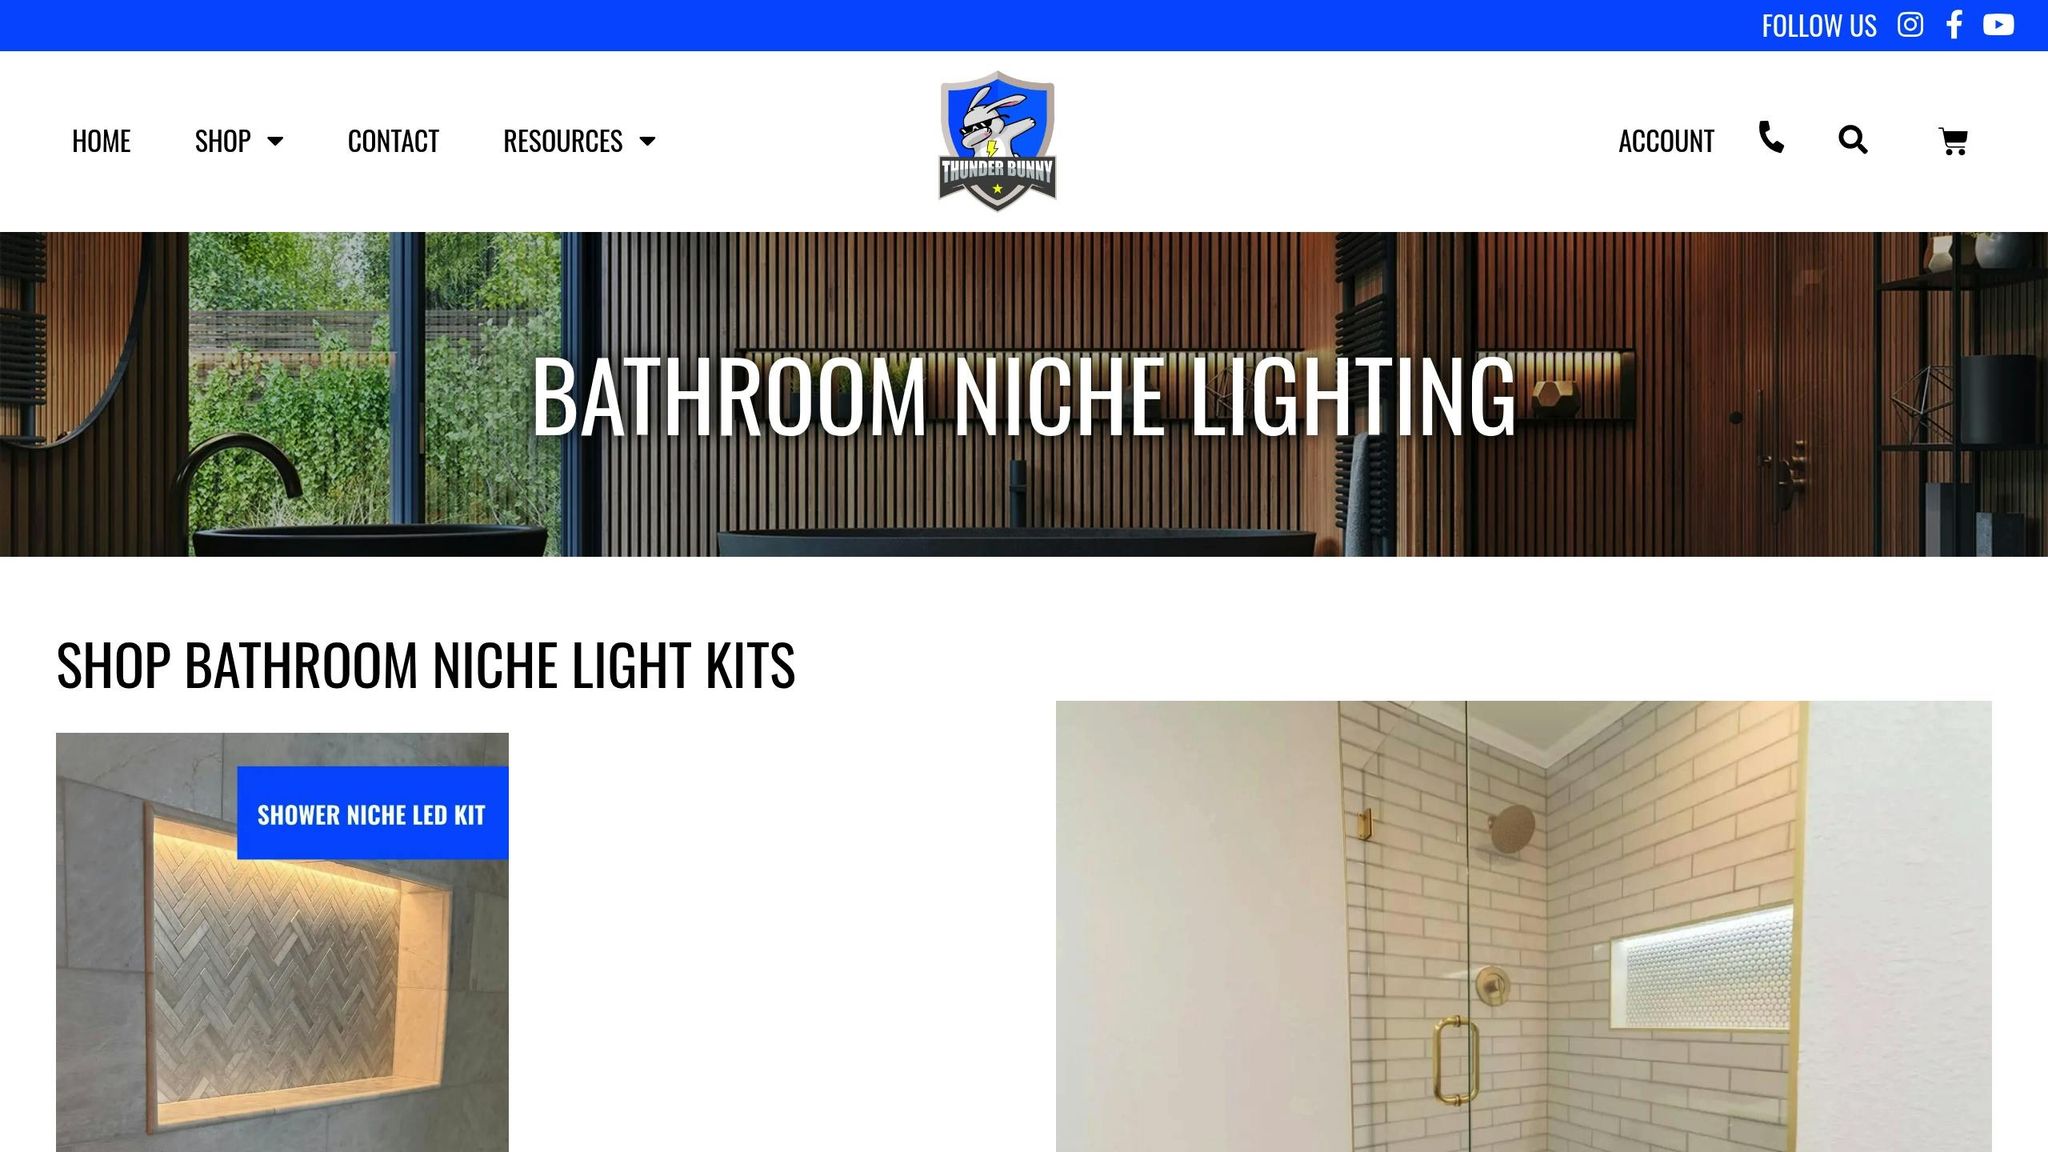
How To Install Waterproof Shower Niche Lights (LED)
How to Choose LED Strips for Bathroom Niches
Picking the right LED strips for your bathroom niche isn’t just about aesthetics – it requires careful consideration of waterproofing, lighting quality, and compatibility with controls. Bathrooms are humid and wet, so you’ll need LED strips specifically designed for these conditions. Let’s break it down, starting with waterproofing.
Waterproof Ratings: What You Need to Know
The IP (Ingress Protection) rating is key when it comes to bathroom lighting. This two-digit code tells you how well the LED strip is protected against dust and water.
For bathroom niches, go for LED strips with a minimum IP65 rating. The first digit (6) ensures the strip is completely dustproof, while the second digit (5) means it can handle water jets from any direction. If the strip will be exposed to direct water contact, look for IP67 or IP68 ratings for added durability.
- IP67: Handles submersion in up to 3.3 feet of water for 30 minutes.
- IP68: Designed for continuous submersion beyond 3.3 feet.
For example, Thunder Bunny’s shower niche LED kits are built specifically for wet environments and provide long-lasting reliability. Make sure the LED chips are sealed with a smooth, uniform silicone coating. Avoid strips with uneven or thin coatings, as they can let water in and fail prematurely.
Choosing the Right Color Temperature and Brightness
The color temperature of your LED strips, measured in Kelvin (K), can greatly impact the atmosphere of your bathroom.
- Warm white (2700K-3000K): Creates a cozy, spa-like vibe.
- Cool white (5000K-6500K): Offers bright, crisp light for tasks like grooming.
- Neutral white (4000K): Balances functionality and comfort, making it a popular choice for modern bathrooms with white or gray tiles.
When it comes to brightness, measured in lumens per foot, the right level depends on how you’re using the niche lighting:
- 150-300 lumens per foot: Ideal for accent lighting that’s noticeable but not overpowering.
- 100-150 lumens per foot: Great for ambient lighting or nightlights.
For ultimate flexibility, consider RGB or tunable white strips. These let you adjust both color and brightness, giving you the option to create different lighting moods throughout the day. They cost more upfront but offer unmatched versatility.
Controllers and Dimmers: Getting It Right
LED strips typically run on 12V DC power, so you’ll need a compatible dimmer system. Avoid using standard 120V AC wall dimmers, as they can damage the strips. Instead, opt for PWM (Pulse Width Modulation) dimmers, which deliver smooth and flicker-free dimming. Look for controllers with at least 256 dimming levels for precise adjustment.
For added convenience, smart controllers are a great option. These connect via Wi-Fi or Bluetooth, allowing you to control your lighting with a smartphone app or voice commands. You can set schedules, adjust colors on RGB strips, and integrate the lighting with your home automation system.
Thunder Bunny’s LED kits are compatible with standard dimmer switches but require a separate light switch installation. This setup makes it easy to control your niche lighting alongside the rest of your bathroom’s electrical features.
When choosing a controller, check its wattage capacity. For example, a 16-foot LED strip drawing 4.8 watts per foot requires a controller rated for at least 77 watts. Always leave some extra capacity to prevent overheating, especially in the warm, humid conditions of a bathroom. Undersized controllers can fail prematurely, so it’s better to err on the side of caution.
Required Tools and Materials
Before diving into the installation, gather everything you’ll need to make the process as smooth as possible. Having the right tools and materials on hand can save you from those frustrating mid-project trips to the hardware store. While many of these are common household tools, a few specialized items will help ensure a polished, professional-looking result.
Basic Tools List
Start with a measuring tape to get precise dimensions for your niche. For cutting LED strips, use scissors or wire cutters specifically designed for the job – regular scissors can damage the copper contacts. A level is essential to ensure mounting channels are straight, which helps achieve even light distribution.
For surface prep, have cleaning supplies ready, like isopropyl alcohol (70% or higher) and lint-free cloths. Clean surfaces are key to ensuring the adhesive on mounting channels and LED strips sticks properly. If your installation involves screws, grab a drill with bits and a screwdriver set for secure connections.
Safety is a priority, so include a voltage tester or multimeter to confirm the power is off before working with electrical components. If you’re working in tight spaces, like bathroom niches, a flashlight or headlamp can significantly improve visibility. Don’t forget safety gear – wear safety glasses and rubber gloves for added protection.
Thunder Bunny LED Kit Components
If you’re using Thunder Bunny’s Shower Niche LED Light Kit, you’re in luck – it includes nearly everything you’ll need. The kit features solid core IP68 COB LEDs with 320 LEDs per 8-foot strip, delivering bright, even lighting with a CRI90+ rating for excellent color accuracy.
"Everything you need is included except the light switch", – Thunder Bunny Co.
The kit operates on a 24V system, which is more efficient than 12V setups and ensures consistent brightness across longer runs – perfect for larger niches. It also includes a dimmable power converter with an IP67 rating, designed to handle bathroom conditions while offering smooth dimming functionality.
Other essentials in the kit include waterproof connectors, end caps, waterproof glue, and heat-shrink tubing, all of which are crucial for creating watertight connections. The IP67 quick disconnects make installation simpler by allowing sections to be connected or disconnected without permanent wiring.
Customers rave about the ease of installation and the kit’s comprehensive components. Verified reviews highlight its perfect 5.00 out of 5 rating, with contractors particularly appreciating the clear instructional videos provided in both English and Spanish.
Once you’ve organized your kit components, double-check the power supply requirements to ensure everything is set for a safe and efficient installation.
Power Supply and Voltage Requirements
The kit includes a dimmable driver that converts 120V AC to 24V DC, a safer and more efficient option for bathroom lighting. This low-voltage system is ideal for wet environments and ensures reliable LED performance.
Make sure your power supply is a Class 2 unit, which limits output to 96 watts or less. This safety feature reduces the risk of electrical shock – an especially important consideration for bathroom installations.
To calculate your power needs, multiply the LED strip’s wattage per foot by the total length you’re installing. For instance, if the strip uses 4.8 watts per foot and you’re installing 10 feet, you’ll need at least 48 watts. Always choose a power supply with about 20% extra capacity to avoid overheating and prolong the life of your components.
GFCI protection is typically required by electrical codes for bathroom installations, adding another layer of safety. Place the power supply and any controllers in a dry, well-ventilated area away from direct water exposure. Good locations include under a floating vanity or inside a nearby cabinet, where they’ll stay safe but remain accessible for maintenance.
"A class 2 power supply means it does not exceed 96 watts of output. This is a safety measure to help prevent the risk of shock", – aspectLED
If electrical work isn’t your strong suit, consider hiring a licensed electrician to ensure everything is installed correctly and complies with local codes. Professional installation guarantees your lighting system will function safely and reliably for years to come.
Installation Steps
With your materials and tools ready, follow these steps to properly install your LED strips. Careful preparation and attention to detail will help you achieve a polished, long-lasting result.
Testing and Measuring First
Before committing to installation, test your LED strips. Connect them to the power supply and controller to confirm they light up and respond to dimming controls as expected.
Next, measure the niche with precision. Use a measuring tape to account for corners, edges, and any obstacles that might affect placement. Determine how much strip you’ll need for each section and mark the cutting points on the LED strips. This step helps minimize errors and avoids wasting materials.
"You can see here there’s a positive and negative terminals right here on my finger positive and negative and so that’s where the wire attaches so on these strips you can actually cut at any one of these junctions right here where the copper terminals are." – Isaac Ostrom, Tile Expert, O. Tile
Cut the strips only at the designated copper junctions, which are typically spaced at regular intervals (often every 12 inches). Cutting elsewhere could damage the strip. Use sharp scissors or electrical wire cutters to ensure clean, precise cuts.
Once your strips are ready, prepare the surface for a strong adhesive bond.
Surface Preparation
Begin by thoroughly cleaning the niche. Use isopropyl alcohol and a lint-free cloth to remove dust, grease, or residue, especially in corners and edges where debris tends to accumulate. A clean surface is crucial for the adhesive to stick properly.
Make sure the area is completely dry before moving forward – any lingering moisture can interfere with adhesion and cause the strips to peel over time. If the niche was recently tiled or grouted, allow at least 24 hours for curing before proceeding.
For textured surfaces, lightly sand the area with fine-grit sandpaper (220 grit or higher) to create a smoother surface for the adhesive. After sanding, remove any remaining dust to ensure a clean application.
If you’re using mounting channels like the Schluter DECO-SG Profile, this is the time to install them. These channels not only give a polished, professional look but also provide added waterproofing and make replacing the LED strips easier down the line.
Installing and Connecting LED Strips
Start at one end of the niche and work methodically toward the other. Peel off only a small section of the adhesive backing – about 6 inches at a time – to maintain control as you position the strip. Once adhered, repositioning the strip is difficult and can weaken the adhesive.
Press the strip firmly along its length, paying extra attention to corners and edges to ensure it stays securely in place. If you’re using mounting channels, make sure the strip fits snugly without any gaps or bulges.
For connecting sections of the strip, consider using Thunder Bunny’s IP67 quick disconnects. These waterproof connectors snap together securely and can be easily disconnected later for maintenance or adjustments. Always double-check that the positive and negative terminals align correctly; reversing the polarity could damage the LEDs.
When navigating corners or making turns, avoid sharp bends that might harm the internal wiring. Instead, cut the strip at the nearest copper junction and use a connector to bridge the gap. This approach maintains the strip’s electrical integrity while allowing it to contour smoothly around the niche.
Once the strips are in place, move on to wiring and final testing.
Wiring and Final Testing
Connect the LED strips to the dimmable power converter, carefully following the polarity markings. Thunder Bunny’s 24V system is forgiving, but incorrect wiring can still cause issues. Double-check all connections before powering up.
Route the wiring through dry areas and keep connections away from potential water exposure. Install the power converter in a dry, easily accessible location, such as under a vanity or inside a nearby cabinet. This placement ensures safety and makes future maintenance simpler.
Test the system by turning the lights on and off several times and adjusting the dimming controls. Check that all sections light up evenly and address any flickering or dark spots while the connections are still accessible.
Finally, use a voltage tester to confirm that all connections are secure and free of shorts. This step ensures your installation is safe and ready to withstand the humid bathroom environment.
With testing complete, you can now move on to waterproofing the setup for reliable, long-term performance.
sbb-itb-6294289
Waterproofing and Safety Steps
Once you’ve properly installed your LED system, the next crucial step is ensuring it can handle the bathroom’s humid conditions. These waterproofing and safety measures will help protect your setup over the long term.
Sealing All Connections
Waterproofing starts with sealing every connection to keep moisture out. After cutting the LED strips at the designated copper junctions, carefully seal the end caps using silicone glue.
For Thunder Bunny’s IP67 quick disconnects, insert the LED strip into the connector, making sure the polarity aligns correctly. Then, firmly close the connector cap with pliers and inject silicone glue through the provided injection hole. This will completely fill the connector space, adding a layer of protection against water and humidity.
If you’re working with soldered connections, follow these steps:
- Peel back the silicone covering the solder joints.
- Tin the strip and wires, then solder them securely.
- Test the connection by giving it a gentle tug.
- Cover the soldered area with silicone glue and heat shrink tubing.
Additionally, apply a bead of clear, mold-resistant bathroom-grade silicone sealant where LED strips meet mounting channels or where wires exit the niche area. Allow the sealant to cure fully – this usually takes about 24 hours – before testing the system.
Once all connections are sealed, move on to safety inspections to confirm everything is secure and functioning properly.
Safety Inspections
After waterproofing, it’s time to conduct safety checks to ensure your installation is both compliant and safe to operate. Before powering up the system, double-check all safety measures.
Start by confirming that the LED circuit is protected by a GFCI (Ground Fault Circuit Interrupter). Make sure all components in the Thunder Bunny LED kit are UL-listed, and verify that the power converter has the correct UL markings, voltage, and amperage ratings.
Place the power converter in a dry, ventilated location, such as under a vanity, where it won’t be exposed to water.
Inspect all wiring to make sure no connections are exposed to moisture. Secure any loose wiring using proper management techniques, especially around moving parts like cabinet doors or drawers, to prevent accidental damage.
Test the GFCI by pressing its test button to ensure it cuts power immediately. Use a multimeter to measure the voltage at the LED strips – Thunder Bunny’s 24V system should read close to 24 volts DC. If you notice a significant voltage drop, it could signal connection issues or undersized wiring.
Finally, power up the system and let it run for about 30 minutes. Keep an eye out for unusual heat buildup, flickering, or any other irregularities. The LED strips should stay cool to the touch, and the power converter should operate quietly without overheating. Take photos of connection points and wiring routes for easy reference during future maintenance.
Design and Placement Ideas
Once you’ve ensured proper installation and waterproofing, it’s time to think about creative ways to place your lighting. These design tips balance practicality with style, giving your bathroom both function and flair.
Best Niche Locations
Shower niches are not only functional but can also become a standout feature in your bathroom. To keep things safe and stylish, install LED strips at the top of the niche. This prevents water from pooling on the lights and maintains a clean look. Conceal the wiring behind the niche to protect electrical connections from moisture. This setup creates a sleek, spa-like vibe.
Vanity areas are another great spot for LED lighting. Thunder Bunny’s Floating Vanity LED Light Kits are a perfect fit for recessed niches or open shelves. They enhance the beauty of decorative items while also providing practical lighting for tasks.
Don’t overlook toe kick areas under vanities. Adding LED strips here can create subtle depth and make your bathroom feel more inviting.
Adjustable Lighting Options
Once you’ve chosen the perfect niche locations, focus on fine-tuning the lighting to match your needs. Thunder Bunny’s LED kits come with dimmable features, allowing you to adjust the brightness for either task lighting or a softer, ambient glow.
For task lighting, place LED strips at the front edge of the niche. This positioning ensures maximum light exposure and reduces shadows.
If you’re aiming for a more relaxed, ambient glow, position the strips near the back edge of the niche. This creates a soft, diffused light. However, avoid placing the strips directly on the back wall, as this can cause light loss and uneven distribution due to the 120-degree beam angle. A balanced option is to install the LED strip in the middle underside of the niche. This placement works well for most lighting needs, offering even and pleasing illumination.
Summary and Final Tips
Installing LED strips in bathroom niches demands attention to waterproofing, safety, and placement. Getting these details right ensures a durable and safe installation.
Here’s a quick rundown of the key steps: Waterproofing is critical. Opt for LED strips with an IP65 rating or higher and seal all connections using RTV silicone and heat shrink tubing. Place the LED strips at the top of your shower niches to keep water from pooling directly on the lights.
Electrical safety should always be a priority. Use a Class 2 power supply (with a maximum of 96 watts) to minimize shock risks. Keep power supplies, controllers, and switches in dry locations, well away from water. For the most reliable connections, solder your wires and include drip loops in your wiring to channel any moisture away from electrical components.
Follow local codes and consult a licensed electrician when necessary. Many areas require GFCI outlets for bathroom electrical work, and professional advice can help you avoid expensive mistakes or safety issues. These steps ensure your setup is both safe and compliant.
Plan for future maintenance. Test all connections thoroughly, allow sealants to cure completely, and design your setup with easy access for repairs or upgrades. Thunder Bunny’s contractor-approved LED kits, which come with a 2-year warranty, offer an added layer of reliability.
FAQs
What safety precautions should I take when installing LED strips in a bathroom niche?
When setting up LED strips in a bathroom niche, safety must come first. Opt for waterproof LED strips and make sure they’re sealed properly to avoid water damage or potential electrical risks. To further protect the setup, position the wiring behind the niche, away from any direct contact with water.
Be sure to adhere to local electrical codes and, if you’re unsure, consult a licensed electrician. Using a GFCI (Ground Fault Circuit Interrupter) outlet is a smart choice for preventing electrical shocks. It’s also wise to go with a Class 2 power supply, as it reduces electrical risks and ensures the system operates safely.
By taking these steps, you can create a safe and durable LED lighting setup for your bathroom niche.
How can I keep LED strips waterproof and long-lasting in a humid bathroom?
To keep your LED strips functioning well and safe in a humid bathroom, opt for waterproof LED strips crafted for damp or wet spaces. Make sure to seal all connections with clear RTV silicone, which acts as a barrier against moisture and helps prevent water damage to the system.
Place the wiring entry point behind the niche to shield it from direct exposure to water. For added safety, include a small drip loop in the wiring. This simple loop ensures that any water running along the wire drips off before reaching the electrical components. By following these precautions, you can extend the lifespan and reliability of your LED lighting in moisture-prone areas.
What’s the best way to choose the right color temperature and brightness for LED strips in a bathroom?
To set the right mood in your bathroom, pick an LED strip color temperature that works well with your current lighting. If you want a warm and inviting atmosphere, go for soft white (around 3500K) or warm white (around 3800K). If you’re aiming for a sleek and modern vibe, cool white (around 4900K) or daylight white (around 7000K) might be a better fit.
Be aware that waterproof coatings on LED strips can slightly shift the color temperature, often making it look cooler than expected. It’s a good idea to test the strips in your bathroom before committing to the installation. Choose a brightness level that improves visibility without feeling overwhelming – dimmable options are a smart choice for added control.
Related Blog Posts