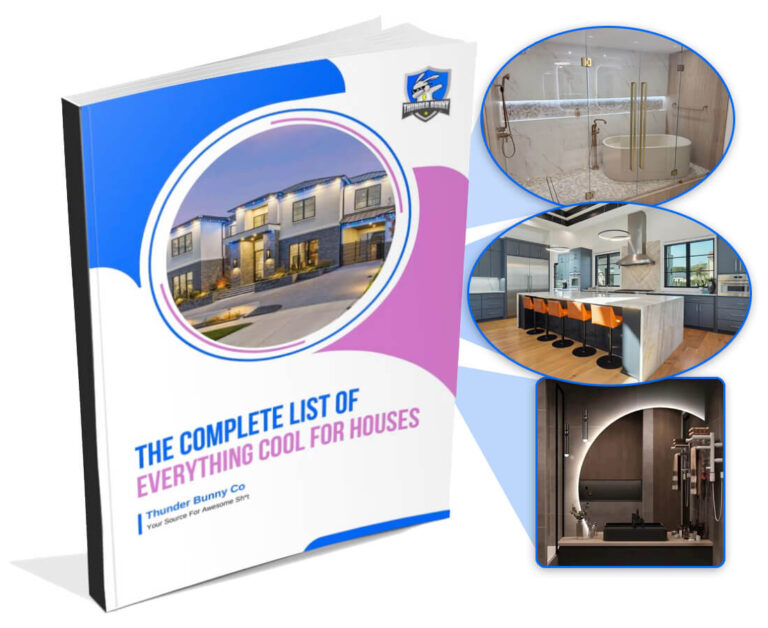
5 Ways to Light Up Small Bathroom Spaces
Small bathrooms often feel cramped and unwelcoming, but smart lighting choices can completely change that. Using LED lighting strategically can brighten the space, reduce shadows, and even make the room appear larger. Here are five lighting ideas to transform your bathroom:
- Recessed Lighting: Flush with the ceiling, these lights provide even illumination without taking up space. Perfect for creating an open, clutter-free look.
- Backlit Mirrors: Combine lighting and reflection for better visibility and a modern, space-saving design.
- Under-Cabinet LEDs: Light up countertops for better functionality and a layered lighting effect.
- LED Strips in Shower Niches: Highlight architectural details while adding soft, ambient light.
- Vanity LED Lighting: Focused light for grooming tasks, eliminating shadows and improving clarity.
Each of these solutions uses energy-efficient LEDs, which last longer and reduce electricity costs. By layering these lighting options, you can create a brighter, more functional, and visually appealing small bathroom.
Small Bathroom Lighting Tricks That Instantly Transform Your Space!
1. Recessed Lighting for Clean, Open Look
Recessed lighting sits flush with your ceiling, creating a sleek and uncluttered appearance. Unlike pendant lights or oversized fixtures that hang down and crowd the room, recessed lights blend seamlessly into the ceiling while still providing bright and even illumination throughout the space.
Why Recessed Lighting Works in Small Bathrooms
One of the biggest perks of recessed lighting is how it opens up your visual space. In small bathrooms, every inch counts, so bulky fixtures that take up headroom or add visual clutter can make the room feel even tighter. Recessed lights solve this problem by integrating into the ceiling itself.
These lights deliver consistent, shadow-free illumination, eliminating the dark corners that can make a small bathroom feel even smaller. LED recessed lights are a smart choice, especially for bathrooms, as they consume 75% less energy and last up to 25 times longer than traditional incandescent bulbs.
For compact bathrooms, 3-inch diameter fixtures strike the right balance. They’re small enough to avoid overwhelming the space but still provide sufficient light output. In some cases, a single recessed light can provide ample ambient lighting for a small bathroom, though additional task lighting near the vanity is often a good idea.
Proper installation is key to ensuring these benefits and optimizing your bathroom’s functionality.
Installation Tips for Recessed Lighting
Start by planning your layout carefully. For a ceiling height of 9 feet, space your recessed lights about 4.5 feet apart to ensure even light distribution without over-lighting the area.
Safety should always come first. Before installing any fixtures, turn off the power at the main breaker and use a voltage tester to confirm the electricity is off. Make sure you follow local safety codes and secure any necessary permits.
Moisture ratings are critical when installing recessed lights in bathrooms. For shower areas, only use wet-rated fixtures – damp-rated lights won’t cut it in high-moisture zones. Look for fixtures with lens covers and "shower trim" specifically designed for wet conditions.
When planning your installation, locate joists with a stud finder, mark the positions, and drill pilot holes to check for any hidden wires, pipes, or ductwork. If your lights will come into contact with insulation, make sure they are IC-rated to prevent overheating and ensure safe operation.
For vanity areas, position recessed lights at a distance equal to half the depth of the vanity. This placement minimizes shadows on your face while using the mirror. However, recessed lighting alone might not provide enough illumination for detailed tasks like grooming. Pairing recessed lights with wall sconces or other vanity lighting can create the perfect balance.
2. Backlit Mirrors: Function and Style Combined
Backlit mirrors are a clever way to modernize a small bathroom by combining lighting and reflection into a single fixture. Instead of juggling separate mirrors and light fixtures that fight for wall space, a backlit mirror offers a sleek, space-saving alternative. This all-in-one design not only enhances functionality but also creates the illusion of a more spacious bathroom.
Benefits of Backlit Mirrors
Backlit mirrors make daily routines – like shaving, applying makeup, or following a skincare regimen – easier and more precise. The soft, diffused light that radiates from behind the mirror reduces shadows, offering clarity where you need it most.
Beyond practicality, these mirrors add depth and dimension to your bathroom. The gentle glow around the edges creates an optical illusion that makes walls feel farther apart, helping a small space appear larger and more open. Plus, this ambient lighting doubles as mood lighting in the evening, offering just enough illumination for nighttime visits without the harsh glare of traditional fixtures.
Many backlit mirrors also come with thoughtful features like built-in defoggers, which keep the surface clear even after steamy showers. And because they often use LED technology, these mirrors are energy-efficient and long-lasting, making them a smart choice for both your wallet and the environment.
Choosing the Right Backlit Mirror for Your Bathroom
When picking a backlit mirror, aim for one slightly smaller than your vanity to maintain a balanced look without overpowering the space.
Pay attention to color temperature, as it sets the tone for your bathroom. Warm white lighting creates a cozy, relaxing vibe – perfect for winding down in the evening. On the other hand, cool white lighting provides sharp, clear illumination for tasks that require precision. Many high-end models let you adjust the color temperature, giving you flexibility throughout the day.
Dimming capabilities are another handy feature. With adjustable brightness, you can easily switch between bright task lighting for busy mornings and softer, more relaxing light at night. Touch-sensitive controls or motion sensors can add an extra layer of convenience, especially when your hands are wet or full.
It’s also crucial to choose a mirror designed for humid environments. Look for one that’s rated to handle moisture, especially if it will be near areas prone to water exposure.
Finally, think about installation options. Wall-mounted mirrors save counter space, while recessed models provide a sleek, built-in look that optimizes every inch of your bathroom. Some mirrors even include integrated storage, combining style with practicality for a truly functional upgrade.
3. Under-Cabinet LED Lighting: Better Countertop Visibility
Under-cabinet LED lighting can turn dim countertop areas into bright, functional spaces, making daily tasks much easier. By addressing the shadows often created by overhead lights, these LEDs provide focused illumination right where it’s needed. In small bathrooms, where space is at a premium, under-cabinet lighting not only enhances visibility but also adds layers of light that create depth without taking up any extra room.
These lights are more than just practical. During the day, they serve as task lighting for activities like sorting toiletries, reading labels, or grooming. At night, they double as soft accent lighting, offering a cozy glow without the harshness of overhead fixtures.
Practical Benefits of Under-Cabinet LEDs
Under-cabinet LEDs do more than brighten your space – they make it safer and more functional. Clear visibility reduces the chances of accidents, like knocking over bottles or struggling to locate items in poorly lit areas.
They also enhance the aesthetic appeal of your bathroom. By highlighting the textures and colors of countertop materials like marble, quartz, or laminate, these lights add depth and dimension. This layered lighting effect prevents the flat, dull look that can result from relying solely on overhead fixtures, making even the smallest bathroom feel more inviting.
LEDs are also highly energy-efficient, making them perfect for extended use. You can leave them on throughout the day without worrying about high electricity costs, and their long lifespan means you won’t need to replace them frequently.
Installation Tips for Under-Cabinet Lighting
To get the best results from under-cabinet lighting, follow these key installation tips:
- Placement matters. Position LED strips about 2-3 inches from the front edge of the cabinet for even light distribution and to minimize shadows. Avoid placing them too far back, which can cast unwanted shadows, or too close to the edge, which might cause glare.
- Choose the right mounting option. Adhesive-backed LED strips are quick and easy to install. Just clean the surface with rubbing alcohol beforehand to ensure they stick, even in humid bathroom conditions. For a more permanent solution, hard-wired options eliminate visible cords but may require professional installation.
- Manage cords neatly. Use cord covers or channels to hide wiring along cabinet edges, or route cables through the back of cabinets for a cleaner look. If you’re using plug-in models, consider installing an outlet inside or behind the cabinet to keep cords out of sight.
For a hassle-free upgrade, consider products like Thunder Bunny‘s Floating Vanity LED Light Kits. These waterproof kits, priced between $39.00 and $150.00, are designed specifically for bathrooms and include everything needed for installation. They’re available in various sizes to suit different vanity setups, making them a great choice for DIY projects.
When selecting LED strips, make sure they’re rated for bathroom use and offer moisture protection. Warm white LEDs (2700K-3000K) provide a cozy, inviting glow, while cool white options (4000K-5000K) deliver bright, crisp lighting for tasks. Dimmable options let you adjust the brightness throughout the day, from energizing morning light to relaxing evening ambiance.
Finally, think about the power source. Battery-operated strips are easy to install but will need periodic battery changes. Plug-in models ensure consistent power but require accessible outlets. For the cleanest look, hard-wired installations are ideal, though they may require professional expertise.
sbb-itb-6294289
4. LED Strip Lighting in Shower Niches and Alcoves
After under-cabinet lighting, LED strip lighting is another way to elevate small bathroom designs, especially by illuminating shower niches and alcoves.
These lights can completely transform these spaces, highlighting architectural details while making small bathrooms feel more open and functional. The key to success lies in precise placement and ensuring proper waterproofing. When installed correctly, LED strips can handle the moisture typical of bathroom environments.
Creative Ways to Use LED Strip Lighting in Bathrooms
LED strip lights bring versatility to bathroom design. Here are some popular ideas:
- Shower Niches: Installing LED strips along the top or sides of recessed shelving creates a soft glow, making items easier to see while showcasing tile textures.
- Alcoves: Outlining built-in alcoves around bathtubs or vanities with LED strips draws attention to their design and adds a touch of elegance.
- Floating Shelves: Add LED strips beneath floating shelves to create a hovering effect, blending style with functional task lighting.
- Toe Kick Areas: Soft lighting under vanities can help with nighttime navigation without being harsh on the eyes.
- Backlit Mirrors: Place LED strips behind frosted glass or around mirror frames for a sleek, custom backlit effect.
While these placements enhance both aesthetics and functionality, ensuring safety in wet areas is critical.
Safety Tips for Wet Areas
Using LED strip lighting in showers or other wet zones requires careful planning to avoid water-related risks. Waterproofing is non-negotiable to protect against water damage and electrical hazards.
- Choose the Right IP Rating: For areas exposed to direct water, use LED strips rated for wet locations. In spots with occasional splashes, an IP65 rating usually suffices.
- Strategic Placement: Keep LED strips and wiring away from direct water flow and areas where water might pool.
- Power Supply Location: Install the power supply and control units in a dry area to reduce the risk of water exposure.
- Seal Connections: Ensure all electrical connections are sealed to prevent water intrusion.
- Follow Electrical Codes: Adhere to local electrical codes and consider hiring a licensed electrician for complex setups. Many areas require GFCI protection for bathroom lighting circuits to meet safety standards.
For a reliable option, check out Thunder Bunny’s Shower Niche LED Lighting Kits, priced between $249.00 and $350.00. These kits are designed for wet areas, include all necessary waterproofing components, and come with detailed installation videos to guide safe DIY projects.
5. Vanity LED Lighting: Better Task Lighting
Vanity LED lighting is a game-changer when it comes to creating focused, functional light for daily grooming tasks. Unlike ambient lighting that brightens the entire room, vanity lighting is all about precision – it targets specific areas where clarity is essential. In small bathrooms, where space is tight, this focused lighting becomes even more important.
The right setup eliminates the harsh shadows that overhead fixtures often cast, especially around the face and neck. Properly positioned LED vanity lights provide even, balanced illumination, making detailed tasks like shaving, applying makeup, or skincare routines easier and more accurate.
Why Choose Vanity LED Lighting?
Vanity LED lighting offers several standout benefits, making it ideal for compact bathroom spaces:
- Energy Efficiency: LEDs use up to 80% less energy than traditional incandescent bulbs, helping reduce electricity bills and cutting down on how often you need to replace bulbs.
- Shadow Reduction: Unlike overhead lights that create unflattering shadows, LED vanity lights provide clear, even lighting, making grooming tasks much more manageable.
- Color Accuracy: High-quality LEDs with a Color Rendering Index (CRI) above 90 display colors more accurately. This is a huge plus for makeup application and coordinating outfits. Many fixtures also allow you to adjust the color temperature – warmer light for relaxing evenings and cooler light for energizing mornings.
- Space-Saving Design: LEDs generate very little heat, so they can be installed close to mirrors and in tight spaces without causing discomfort. Their compact design makes them perfect for small bathrooms.
To make the most of these benefits, proper installation is crucial.
How to Install Vanity LED Lights the Right Way
Getting the placement of your vanity lights right is key to achieving the best results. Here are some tips to guide you:
- Height Matters: Mount vanity lights at a height of 75 to 80 inches from the floor. This positions them at eye level for most adults, ensuring even illumination across the face and reducing glare.
- Side-Mounted Fixtures: For the best lighting, install LED sconces on either side of the mirror. This eliminates shadows and provides balanced illumination. If side mounting isn’t an option, a horizontal LED light bar above the mirror can work well – just ensure it’s positioned correctly.
- Spacing from the Mirror: Place fixtures 3–6 inches from the mirror’s edge. This minimizes glare while providing sufficient light coverage, especially in narrow vanity areas.
- Dimmable Options: Choose dimmable fixtures for flexibility. Bright light is great for morning routines, while softer lighting works better for winding down in the evening. Adding dimmer switches gives you control over brightness levels.
- Toe-Kick Lighting: For floating vanities, consider adding toe-kick lighting. It complements your overhead vanity lights and adds depth to the space. Thunder Bunny’s Vanity LED Light Kits, priced between $39.00 and $150.00, offer waterproof solutions tailored to different vanity sizes. These kits also include step-by-step installation guides for DIY enthusiasts.
Electrical Considerations
When planning your installation, don’t overlook the electrical details. Small bathrooms often have limited space for wiring, so careful planning is essential. LED vanity lights typically need dedicated circuits with GFCI protection to meet bathroom electrical codes. If you’re renovating, map out wire routes early to avoid costly wall repairs later.
Finally, for a balanced look and effective lighting, choose fixtures that cover about 75% of your mirror’s width. This proportion ensures even light distribution and keeps the design visually appealing. With the right setup, vanity LED lighting can transform your small bathroom into a more functional and inviting space.
Conclusion: Transform Your Small Bathroom with LED Lighting
A small bathroom doesn’t have to feel cramped or dim. The five LED lighting ideas we’ve explored – recessed lighting, backlit mirrors, under-cabinet LEDs, strip lighting in niches, and vanity lighting – each tackle common challenges in compact spaces. When used together, they can completely change the look and feel of your bathroom.
Recessed lighting spreads soft, even light throughout the room, creating a welcoming ambiance. Backlit mirrors add a sleek, modern vibe while visually opening up the space. Under-cabinet LEDs make countertops more functional and easier to use, while strip lighting in shower niches turns simple storage into a design highlight. Finally, vanity LED lighting ensures you have the perfect brightness for grooming tasks.
Combining these lighting types can make a dramatic difference. Instead of relying on a single overhead fixture, layering lighting – like pairing recessed lights with a backlit mirror and under-cabinet LEDs – can make your small bathroom feel more spacious and luxurious. The trick is to think in zones, addressing each area’s specific needs rather than trying to light the whole room from one source.
LED lighting makes this approach not only possible but also budget-friendly. Thunder Bunny’s range of contractor-approved LED products, complete with solid warranties, offers practical solutions for upgrading your bathroom over time without overspending.
Placement matters just as much as the lighting itself. Whether it’s ensuring your vanity lights are at the right height or using waterproof LED strips in wet zones, careful installation is key to maximizing the impact of your lighting upgrade.
With thoughtful planning and the right LED fixtures, you can turn your small bathroom into a space that feels brighter, more functional, and even larger. It’s not about the size of the room – it’s about making smart lighting choices.
FAQs
What should I look for in LED lighting to ensure it’s safe for use in a damp bathroom?
When selecting LED lighting for damp bathroom areas, prioritize fixtures with a high IP rating (Ingress Protection). Aim for ratings such as IP65 or above, as these are designed to resist water and moisture effectively. This is crucial for lights installed near showers, bathtubs, or sinks where exposure to water is more likely.
It’s also a good idea to choose LEDs specifically made for bathrooms. These are engineered to withstand the challenges of humid environments. To ensure both safety and optimal performance, always adhere to the manufacturer’s installation instructions.
How can layering different types of LED lighting improve a small bathroom’s look and functionality?
Layering LED lighting in a small bathroom can completely change the feel and usability of the space. By using a mix of lighting types – like recessed ceiling lights, vanity lighting, and accent lights – you can achieve a setup that’s both practical and visually appealing.
This method provides bright, focused lighting for tasks such as shaving or applying makeup, while softer, ambient lights create a calming atmosphere. A well-thought-out lighting design doesn’t just make the bathroom more functional; it also adds a touch of style, helping the space feel larger and more welcoming.
How do I choose the right color temperature and dimming options for LED lights in my bathroom?
When selecting LED lights for your bathroom, it’s important to think about color temperature and dimming features to achieve the perfect lighting setup. The color temperature, measured in Kelvin (K), defines the light’s tone, ranging from warm to cool. If you’re aiming for a calm, spa-like atmosphere, go for warm lighting around 3000K. On the other hand, for tasks like shaving or applying makeup, cooler, brighter lighting around 5000K is ideal. For a more versatile option that works well for general use, consider neutral white lighting in the 3500K–4100K range.
Dimming features add another layer of flexibility, letting you adjust the brightness to match your mood or activity. By using dimmable LEDs with a compatible dimmer switch, you can fine-tune your bathroom lighting to balance functionality and ambiance. Combining various light types with dimming options can elevate even the smallest bathroom, making it both stylish and practical.
Related Blog Posts
Your Ultimate Home Building & Remodeling Guide
Download our guide of all the coolest stuff you need to know about when building or remodeling your home!