Check out this quick video on how to install our lighting kit!
Thank you for your order
Please send this page to your contractor!
This 15 minute detailed video includes all of the updates made to the kits purchased on or after September 1, 2025.
0:00 Introduction to kit 0:30 Running low voltage wire & driver location 3:05 How to tile your niche with the channel 6:12 Electric installation
¡Mira este video sobre cómo instalar nuestro kit de iluminación!
Desplázate hacia abajo para ver diagramas sobre la preparación del nicho de ducha, diagramas de cableado y cómo instalar correctamente el LED.
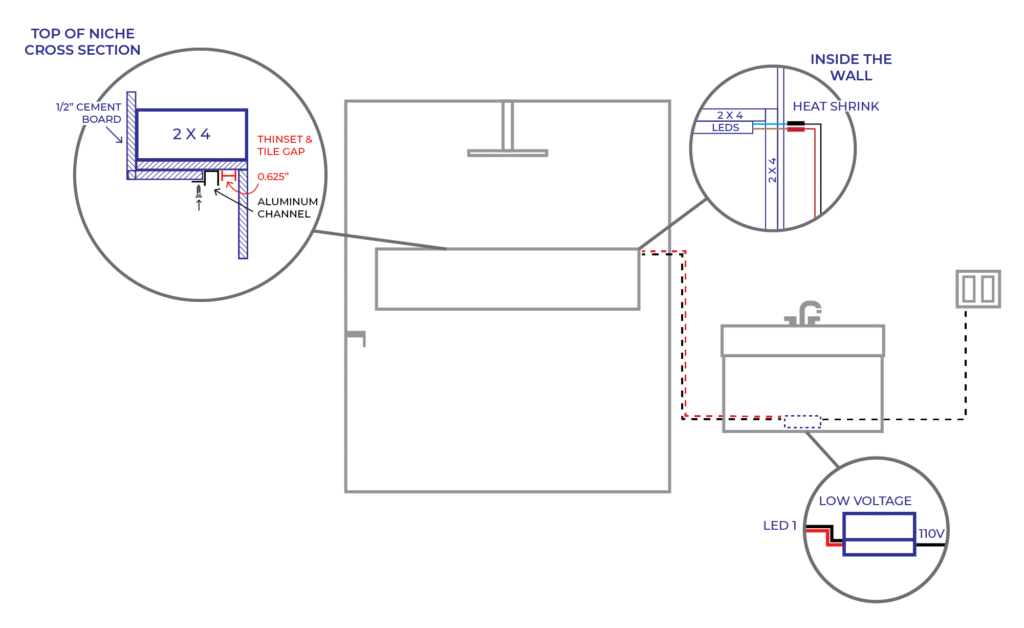
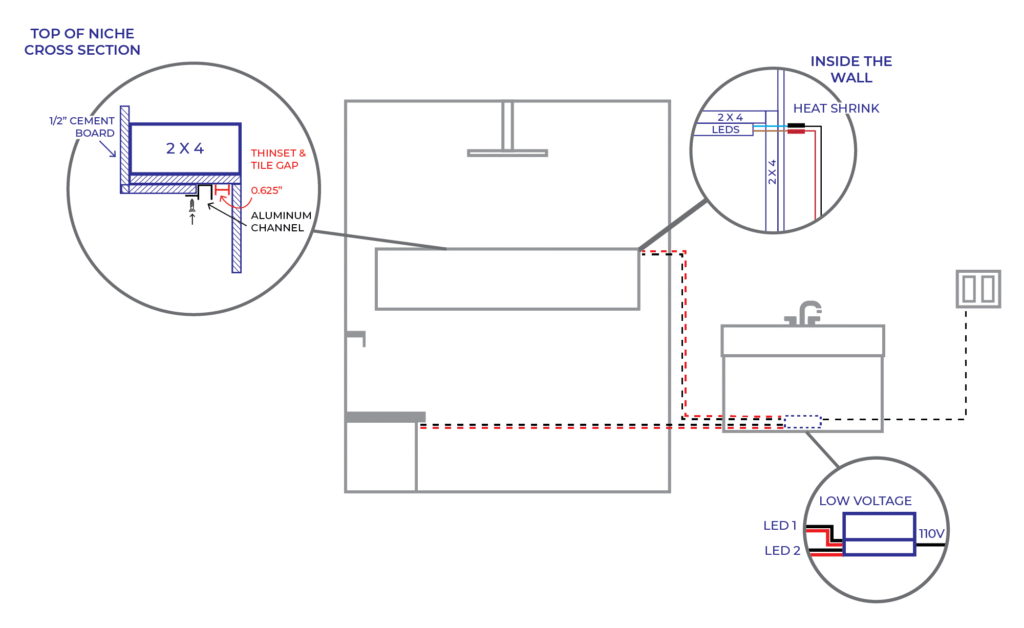
Installation Diagram
We recommend using the shrink wrap connectors on the LED strip connection to allow for easier replacement.
2 LED Location Wiring
We recommend using the shrink wrap connectors on the LED strip connection to allow for easier replacement.
Aluminum Channel Installation
The channel is made to attach to the cement board located at the top of the shower niche.
When installing the channel you want to make sure you leave enough of a gap to account for the thickness of the thin set and wall tile. Typically a 5/8 inch gap between the channel and the back cement board will be plenty for most tiles.
Detailed Installation Video
This 15 minute detailed video includes all of the updates made to the kits purchased on or after September 1, 2025.
0:00 Introduction to kit 0:30 Running low voltage wire & driver location 3:05 How to tile your niche with the channel 6:12 Electric installation
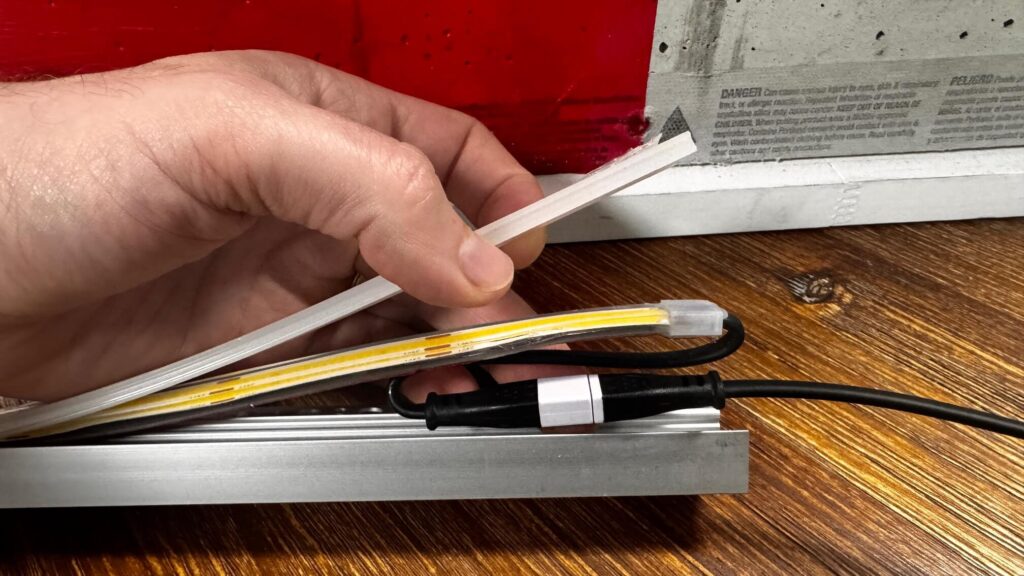
Waterproof Quick Disconnect
The LED strip in your kit are designed to be replaced if they should burn out. They come with a 2 year warranty and are rated for 5000 hours. The disconnect are designed with our channels to fit inside. If you need to replace it you can pop out the diffuser and plug in a new LED strip.
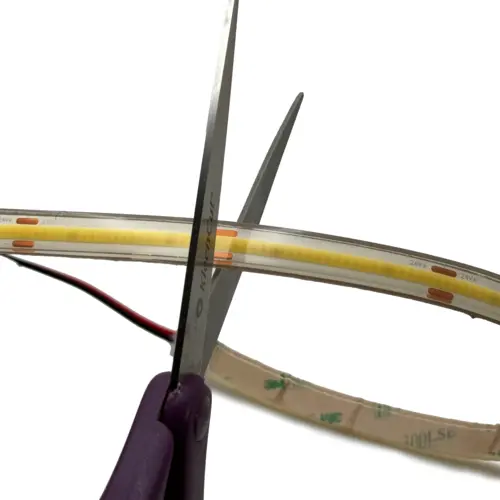
Cut Your LED Strip To Size
The LED strip in your kit can be cut down to size. When cutting the strip it’s important to cut it in the middle of the copper connectors. They are spaced about 1.75″ apart along the length of the strip.
IMPORTANT
If you cut the LED strip then you must silicone on a new end cap to maintain the waterproof rating. Silicone and endcap are provided with the kit.