Bathroom Renovation Checklist: 15 Must-Do Steps
Planning a bathroom renovation? Here’s everything you need to know to avoid costly mistakes and ensure a smooth process. From setting clear goals to installing the final fixtures, this guide breaks down every critical step. Here’s a quick summary:
- Define Goals: Decide if you’re modernizing, improving functionality, or preparing for resale.
- Budget Smart: Allocate funds for labor, materials, and unexpected costs (include a contingency fund).
- Get Permits: Check local requirements for plumbing, electrical, or structural changes.
- Prep the Space: Clear the area, shut off utilities, and protect surrounding furniture.
- Demolition: Remove old fixtures carefully and manage debris with a rented dumpster.
- Plumbing & Electrical: Upgrade systems to meet current codes and handle modern needs like GFCI outlets or heated floors.
- Waterproofing: Apply membranes to wet areas and ensure proper drainage.
- Install Fixtures: Add vanities, sinks, showers, or tubs while ensuring proper alignment and support.
- Flooring & Paint: Use durable, moisture-resistant materials and finishes.
- Lighting & Upgrades: Incorporate LED lighting, smart controls, or bi-fold windows for better functionality and ambiance.
- Final Inspection: Test all systems, fix imperfections, and ensure code compliance.
Key Tip: Always leave room in your timeline and budget for unexpected delays or repairs.
Whether you’re DIYing or hiring a contractor, following these steps will help you transform your bathroom into a functional and stylish space.
How to Remodel a Bathroom | 99 steps | PLAN LEARN BUILD
Planning and Preparing Your Space
Now that you’ve nailed down your goals and budget, it’s time to focus on permits, timelines, and prepping your space. This phase lays the groundwork for your entire project, so tackling these steps early can save you from unnecessary stress down the road.
Get Required Permits
Before making any changes, reach out to your local building department to find out what permits are needed for tasks like moving plumbing, adding electrical circuits, or structural modifications. Permit requirements vary widely depending on where you live, and processing times can range from just a few days to several weeks.
For smaller updates, like swapping out fixtures without changing their location, permits might not be necessary. But for bigger changes – like relocating a toilet, adding outlets, or installing a ventilation fan – you’ll almost certainly need approval. Permits ensure that your project meets safety codes and can help you avoid complications when it’s time to sell your home.
Skipping permits can lead to major headaches. Unapproved work can result in liability issues and often has to be redone if flagged during a home inspection. If you’re working with a contractor, they’ll usually handle the permit process for you. But if you’re taking the DIY route, plan to spend anywhere from $100 to $500 on permit fees, depending on the scope of your renovation.
When applying for permits, you’ll need detailed plans outlining your new layout, as well as any electrical and plumbing updates. Keep all permit documents handy throughout the project – inspectors will need to check in at various stages. Once your permits are squared away, you can move on to building a realistic timeline.
Create a Project Timeline
A well-thought-out timeline keeps your renovation organized and helps ensure that different tasks and tradespeople are coordinated. Bathroom renovations typically take 2 to 4 weeks, though unexpected issues like structural damage or supply delays can stretch that timeframe.
Break your project into phases, and assign practical time estimates to each. For example, demolition usually takes 1 to 2 days, while rough plumbing and electrical work can take 3 to 5 days. Tile installation, including drying time, often requires the most time – potentially a week or more, depending on the complexity of your design.
It’s wise to add some buffer time for surprises. If you uncover water damage behind walls or discover that your electrical panel needs upgrading, these issues can easily add days or even weeks to your schedule.
Plan the order of operations carefully. For instance, plumbing rough-ins need to be done before flooring can go in, and painting should wait until all dusty work is complete. Schedule material deliveries strategically, so items arrive when you’re ready to use them – storing everything upfront can lead to damage or clutter.
If you’re living in the home during the renovation, think about how you’ll manage without a functioning bathroom. A 3-week project without access to your main bathroom can be tricky, especially for families. Having a clear and realistic timeline helps keep everything running smoothly.
Prepare for Demolition
Getting your space ready for demolition can help minimize mess, damage, and delays. Start by clearing out personal items and covering nearby furniture with plastic to keep dust contained. Dust tends to travel, so it’s a good idea to protect areas beyond the immediate work zone.
Turn off water and electricity to the bathroom before starting any demolition. Shut off the main water supply, and drain the lines to avoid flooding when disconnecting fixtures. At the electrical panel, switch off the circuits for the bathroom and tape over the breakers to prevent accidental power-ups.
If your project involves heavy demolition, consider renting a dumpster. A 10-yard dumpster is usually sufficient for most bathroom renovations, but check weight limits for materials like tile and concrete. Place the dumpster close to your work area to reduce hauling distance.
When removing fixtures, start with items like the toilet and vanity to minimize potential damage. Leave larger items, like the shower or tub, for last, as they often require cutting through tile or drywall.
To protect your HVAC system, cover vents to keep dust from clogging filters. Renting an air scrubber can also help capture airborne particles, keeping your space cleaner during demolition and construction.
Before tearing down walls, take photos to document their condition. Once the walls are open, snap pictures of the plumbing and electrical lines. These images can be incredibly helpful if questions arise later about what was behind the walls before the renovation started.
Updating Plumbing, Electrical, and Waterproofing
Once demolition is done and your bathroom is a blank slate, it’s time to tackle the essential systems that keep everything running smoothly. These updates may not be the most glamorous part of a renovation, but they’re absolutely critical for meeting building codes and ensuring long-term functionality.
Update Plumbing Systems
Revamping your plumbing can be tricky, but it’s a must if you’re reworking the layout or upgrading old fixtures. Start by assessing your current water lines and drainage system to figure out what needs replacing or relocating.
If you’re moving fixtures like sinks, tubs, or toilets, you’ll likely need to reroute supply lines and drain pipes. For instance, relocating a toilet means shifting the main drain line, which often involves cutting into the subfloor and adjusting joists – a task that requires careful planning.
Consider upgrading old plumbing materials like galvanized steel or polybutylene pipes to modern PEX piping. PEX is not only easier to install but also flexible, freeze-resistant, and durable. If water pressure has been an issue, you might also want to install larger-diameter supply lines to better handle multiple fixtures.
Don’t forget about your shut-off valves. Swapping out older gate valves for newer ball valves can improve reliability and reduce the risk of leaks.
Upgrade Electrical Systems
After prepping the space, the next step is to modernize your electrical system. Bathrooms today demand more power due to increased lighting, ventilation, and tech-friendly features. To meet safety standards, all outlets in the bathroom should have GFCI (Ground Fault Circuit Interrupter) protection, and many areas require dedicated circuits for bathroom use.
Make sure you install enough GFCI outlets around the vanity for added convenience – especially for appliances like hair dryers or electric razors. If heated floors are part of your plan, they’ll likely need a dedicated 240-volt circuit, so be sure to include this in your electrical layout.
Ventilation fans with integrated lighting or smart controls also require proper wiring. Addressing these needs during the rough electrical phase can save you from headaches later when the walls are finished.
For future-proofing, consider pre-wiring for smart home features like automated switches, sensors, or other high-tech fixtures. It’s much easier and cheaper to handle this during the renovation than to retrofit later.
Add Waterproofing Protection
Waterproofing is one of those steps you can’t afford to skip – it’s your first line of defense against water damage and costly repairs. Apply a waterproof membrane to wet areas like shower walls and tub surrounds. Liquid membranes work well for straightforward installations, while sheet membranes are better for more intricate setups.
Pay special attention to corners, joints, and any areas where pipes or fixtures penetrate the walls. Reinforcing these spots with waterproof tape or fabric and applying multiple coats of membrane creates a strong, watertight seal.
For showers and tubs, extend the waterproofing as required by local building codes. It’s also a smart idea to waterproof the entire bathroom floor, as water often travels farther than you’d expect, potentially damaging subfloors or nearby rooms.
Proper drainage is equally important. Make sure the floor slopes toward the drain – whether it’s a linear or central drain – to prevent puddling and water issues.
Before moving on to tile installation, allow the waterproofing membrane to fully cure. Following the manufacturer’s curing recommendations ensures your waterproofing system will perform as intended.
As with every step in your renovation, make sure your plumbing, electrical, and waterproofing updates comply with current codes. Schedule inspections for these systems before you move on to finishing the walls and adding the final touches.
sbb-itb-6294289
Installing Fixtures, Features, and Finishes
Once the core systems are in place, it’s time to bring your bathroom renovation to life by installing fixtures and finishes. This is where your space transitions from a construction zone into a polished, functional bathroom.
Install New Shower or Tub
The shower or tub you choose will shape the overall style and functionality of your bathroom. Start by measuring both the bathroom and access points to ensure the fixture fits through doorways and into the space.
For smaller bathrooms, walk-in showers with clear glass panels and built-in niches are a great option. Look for designs with low or no thresholds, grab bars, and slip-resistant surfaces to enhance accessibility. Walk-in tubs are another excellent choice, offering features like quick-draining systems, easy-access doors, and therapeutic jets for added comfort.
Material selection is key. Glass enclosures paired with marble or granite surrounds create a high-end look, while PVC options are a cost-effective alternative. To add a modern touch, consider installing LED lighting kits like Thunder Bunny’s waterproof systems ($249–$350). These lights can highlight your tile work while providing ambient illumination.
When installing, ensure the shower base is properly sloped to prevent water pooling. For tubs, make sure the unit is level and adequately supported to avoid stress cracks or drainage problems.
Once the shower or tub is in place, it’s time to focus on the countertop and sink.
Install Vanities and Sinks
Vanities and sinks not only add functionality but also define the aesthetic of your bathroom. Floating vanities are a popular choice, as they create the illusion of more space and make cleaning the floor easier. These wall-mounted units require solid wall backing, so coordinate with your contractor during the framing stage.
Pairing under-mount sinks with quartz or granite countertops offers a sleek, seamless look. This design eliminates the rim where dirt often collects, making maintenance easier. Be sure to position vanities with at least 30 inches of clearance (36 inches for double vanities) for comfortable use.
Lighting can make a big difference here. Thunder Bunny’s floating vanity LED light kits ($39–$150) can be installed underneath or in the toe kick area to add a stylish accent and provide subtle nighttime lighting.
Don’t forget to install shut-off valves at each plumbing connection – these make future maintenance much simpler.
Install Flooring and Paint Walls
Proper preparation is the secret to durable flooring and a flawless paint job. For flooring, the subfloor should be solid and smooth since any imperfections will show through tile. Always use materials specifically rated for wet bathroom environments.
If you’re tiling over existing tile, start by thoroughly cleaning the surface, repairing cracks, fixing grout, and sanding glazed areas with 100-grit sandpaper to improve adhesion. Before committing to the layout, dry-lay the tiles to ensure proper alignment. Use a notched trowel to spread mortar, spacers for even gaps, and a level to check alignment. For rectangular tiles longer than 24 inches, follow the "1/3 rule" – stagger the tiles by no more than one-third of their length to minimize unevenness. Clean any excess mortar from grout lines immediately to avoid a messy finish.
For painting, begin by applying a bonding primer to the prepared walls. Follow this up with two coats of satin finish paint, which is more durable and resistant to moisture.
Adding Modern Lighting and Upgrades
Once the essential plumbing, electrical, and waterproofing work is complete, modern lighting upgrades can truly elevate your renovation. These finishing touches not only enhance functionality but also create the perfect ambiance, blending practicality with style.
Install LED Lighting Kits
LED lighting kits are a fantastic way to add both flair and functionality to your bathroom. Take Thunder Bunny’s shower niche LED lighting systems, for instance. Priced between $249 and $350, these waterproof kits are designed to withstand direct water exposure, making them ideal for wet areas.
For accent lighting, dimmable LED strips are a great choice. They can highlight intricate tile work, adding depth and sophistication to your bathroom design. Thunder Bunny’s kits come with detailed video guides and have been contractor-approved for professional installation.
If you’re looking to modernize your vanity area, consider Thunder Bunny’s floating vanity LED light kits, which range from $39 to $150. These versatile kits can be mounted under floating vanities for a sleek, contemporary appearance or installed in toe kick areas to provide soft lighting for nighttime navigation. Their waterproof design makes them perfect for high-humidity environments like bathrooms.
When planning your LED installation, keep the 2-year warranty in mind and coordinate with your electrician during the rough-in phase to ensure proper wiring. These systems require a separate light switch, so early planning is key. Beyond their aesthetic appeal, LED systems are known for their energy efficiency and long lifespan, helping you save on energy bills and reduce the need for frequent replacements.
Add Smart Lighting Controls
Pairing LED lighting with smart controls takes your bathroom to the next level. Smart lighting systems not only make life more convenient but also help optimize energy usage. Dimmer switches, for example, allow you to adjust brightness levels throughout the day – bright for morning routines and softer for evening relaxation.
Motion sensors are another smart addition, automatically turning lights on when you enter and off when you leave. Many models let you adjust sensitivity and delay times, so you can fine-tune them to your liking. Timer-equipped smart switches are great for automating tasks, like running the exhaust fan for a set time after a shower. Advanced systems can even integrate with home automation platforms, giving you control through smartphone apps or voice commands.
When choosing smart controls, make sure they’re compatible with your LED systems and rated for bathroom humidity. Neutral wire compatibility is also essential for proper installation.
Install Bi-Fold Windows
For a blend of natural lighting and improved ventilation, bi-fold windows are a standout feature. Thunder Bunny’s thermal break bi-fold windows, priced at $4,200, use an accordion-style design to maximize the opening space.
These windows are equipped with a thermal break, which helps minimize heat transfer and maintain comfortable indoor temperatures – especially valuable in areas where temperature control is critical. The natural light they provide reduces the need for artificial lighting during the day, creating a welcoming atmosphere while also saving energy. Plus, the wide opening allows for excellent cross-ventilation, which can help manage humidity naturally.
Proper installation is crucial for bi-fold windows. Accurate measurements and professional fitting ensure effective weatherproofing. Keep in mind that the accordion-style design requires enough wall space on either side for the folded panels. Thoughtful placement, particularly near showers or tubs, can balance natural light with privacy needs.
Final Steps and Inspection
Your bathroom renovation is almost done! Now it’s time to make sure everything is working safely and as intended.
Check All Installations
Start by testing all electrical components. A LED Circuit Tester (available for around $10 at most hardware stores) is a handy tool for ensuring outlets, switches, and wiring meet safety standards. Look closely to confirm all receptacles and switches have plates securely installed, with no exposed wires anywhere in the bathroom.
Pay extra attention to GFCI outlets – these are essential for bathroom safety. Building codes require at least one outlet within 36 inches of each sink, and all bathroom receptacles must be powered by a 20-amp circuit. Test each outlet by pressing the "test" and "reset" buttons to ensure they work properly.
For lighting, check that all fixtures are securely installed and functioning. If you’ve added Thunder Bunny LED systems or other hardwired lighting, make sure they operate as expected. Verify that light fixtures near bathtubs or showers meet safety guidelines: they must be at least 3 feet away horizontally and 8 feet away vertically from the tub rim or shower threshold. Fixtures in damp areas should be labeled for such use.
Next, test your plumbing. Turn on faucets, showers, and tubs to check for good water pressure and proper temperature control. Inspect for leaks around connections, faucets, and the base of the toilet. If you’ve installed Thunder Bunny bi-fold windows, ensure they open and close smoothly, and check the weatherproofing around their frames.
"Verify that all work complies with local building codes and is performed by licensed professionals." – This Old House
Lastly, have a licensed professional inspect your circuit breaker and electrical work to confirm everything is up to code.
Once you’ve confirmed the plumbing and electrical systems are in good shape, shift your focus to the finishing touches.
Complete Final Details
Take a slow walk through your bathroom to spot any imperfections. Look for uneven surfaces, gaps in caulking, or misaligned tiles. Addressing these small issues now can save you from bigger headaches later.
Give the space a deep clean to remove construction dust and debris. Pay extra attention to fixtures, cabinets, and behind the toilet. A spotless bathroom will help you identify any remaining flaws and give you a clear view of your finished work.
If you’re unsure about your inspection skills, consider hiring a professional. As one expert suggests:
"If you feel intimidated by the task, you can always hire a 3rd party inspector to tag along. This will provide an extra set of experienced eyes to help spot any discrepancies." – Home Stratosphere
Install final accessories like mirrors, towel bars, and other hardware. Make sure they’re securely mounted and placed at heights that work for everyone in your household.
Review Your Checklist
Go back through all 15 renovation steps to ensure everything matches your original plan. Double-check that your goals have been met and that all permit requirements are fulfilled. If your renovation required permits, remember that final inspections are often necessary to confirm code compliance.
Take photos of your completed bathroom. These serve as a record of your work and can be useful for warranties, insurance claims, or future reference if you need to access plumbing or electrical systems.
Finally, test everything again. Turn lights on and off, run water, flush the toilet, and try out any new features like smart lighting controls or ventilation fans. If you’ve installed Thunder Bunny LED lighting systems, confirm they respond correctly to their controls and that any smart features function smoothly.
FAQs
What are some unexpected problems that might come up during a bathroom renovation, and how can I get ready for them?
When tackling a bathroom renovation, you might uncover unexpected problems like water damage, old plumbing or electrical systems, mold, structural issues, or even signs of pests. To avoid being caught off guard, begin with a detailed inspection of your bathroom. Bringing in skilled contractors can also help spot potential issues before they turn into costly surprises.
Planning for the unexpected is key. Consider setting aside around 20% of your total budget as a contingency fund. This extra cushion can help you handle unforeseen expenses without derailing your project. A little preparation goes a long way in saving time, money, and headaches during your renovation.
What steps should I take to ensure my bathroom renovation complies with local building codes and passes inspections?
When planning a bathroom renovation, it’s essential to make sure your project aligns with local building codes and passes inspections. These regulations are in place to ensure safety and proper functionality, covering areas like plumbing, electrical work, and structural modifications.
Start by researching the specific building codes for your area – requirements can vary widely depending on where you live. Before any work begins, secure the necessary permits to avoid potential fines or delays. Bringing in licensed professionals, such as contractors, plumbers, and electricians, is a smart move. Their expertise ensures the job is done correctly and meets all code requirements.
Inspections are another critical step. Be ready for inspections both during and after the renovation process. These evaluations confirm that all work complies with local standards, giving you peace of mind and avoiding future complications.
What are the advantages of adding smart lighting controls and LED lighting to your bathroom renovation?
When upgrading your bathroom, incorporating smart lighting controls and LED lighting can bring a whole new level of comfort and practicality. With smart lighting, you get the power of customization and ease of use – adjust brightness and even color with just your phone or a simple voice command. Imagine setting the perfect lighting for a relaxing bath, precise grooming, or any other moment that calls for a tailored ambiance.
LED lights, on the other hand, are an excellent choice for cutting down on energy use. They consume up to 90% less energy than old-school incandescent bulbs. Pair them with motion sensors or timers, and you’ll save even more by ensuring lights only stay on when needed. Plus, smart lighting isn’t just about convenience – it can also boost safety by lighting up pathways or using motion-activated features to deter unwanted guests. These upgrades don’t just modernize your space; they make it smarter, more efficient, and safer.
Related Blog Posts
Your Ultimate Home Building & Remodeling Guide
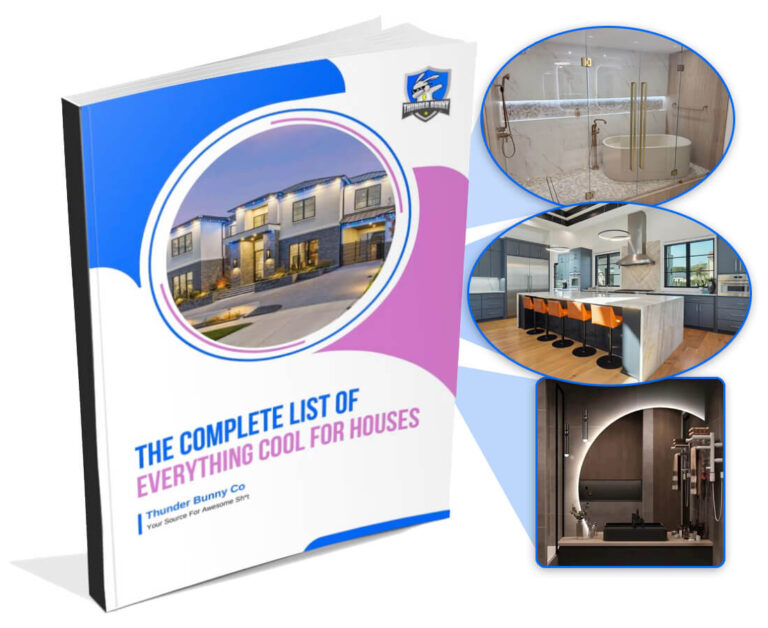
Download our guide of all the coolest stuff you need to know about when building or remodeling your home!